Datalogic Launcher Page
This page allows the user to configure the Datalogic Launcher.
Minimum required firmware
All other devices running Android 11 or above that are not listed in the table are fully supported.
| Device | OS Version | Minimum Firmware Version |
|---|---|---|
| Skorpio X5 | 13 11 10 | ✅ ✅ 2.12.008 |
| Memor 20 | 13 11 9 | ✅ 3.06.001 1.10.08 |
| Memor 10 | 10 9 8.1 | 3.01.05 ❌ ❌ |
| Joya Touch A6 | 9 | ❌ |
Legend: ✅ Supported in every release • X.XX.XXX First version supported • ❌ Not Supported in any release
Import Settings From File
This section allows the user to import a launcher configuration file (launcher.cfg). Launcher configuration files are generated by the launcher application and are a way of cloning launcher configurations from one device to another. To import a configuration, click the Import Settings button and use the file picker to select the launcher configuration file.
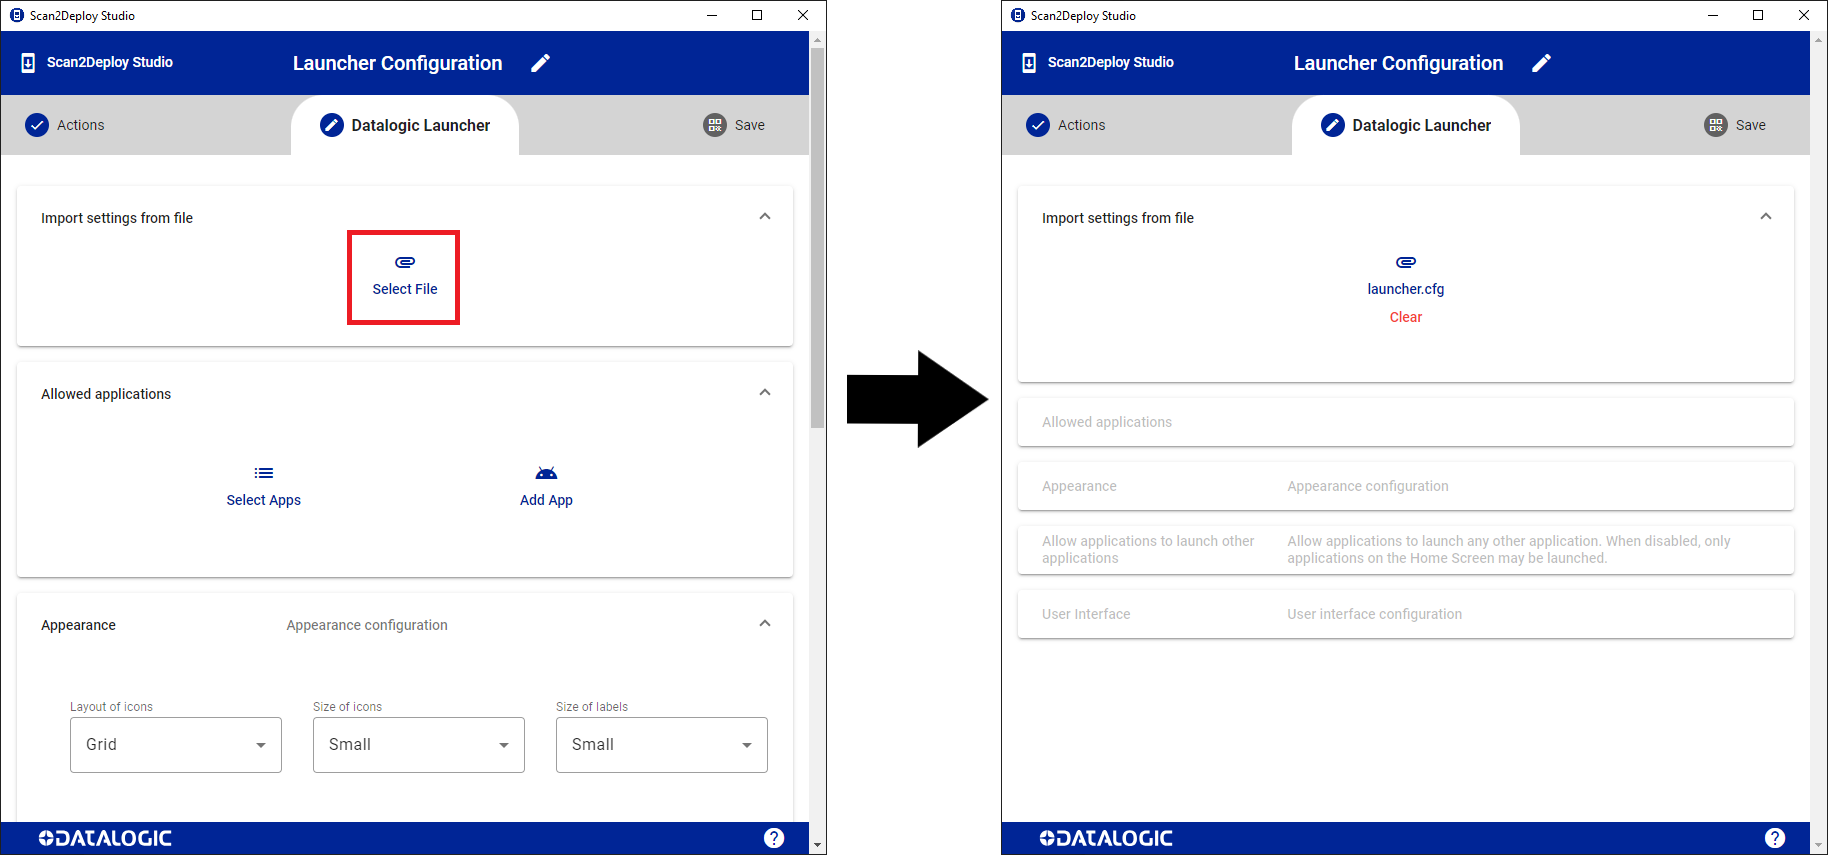
Once a configuration has been imported, all other controls will be reset and disabled, and a clear button will appear. Clicking the Clear button removes the launcher configuration and re-enables all the other controls.
Allowed Applications
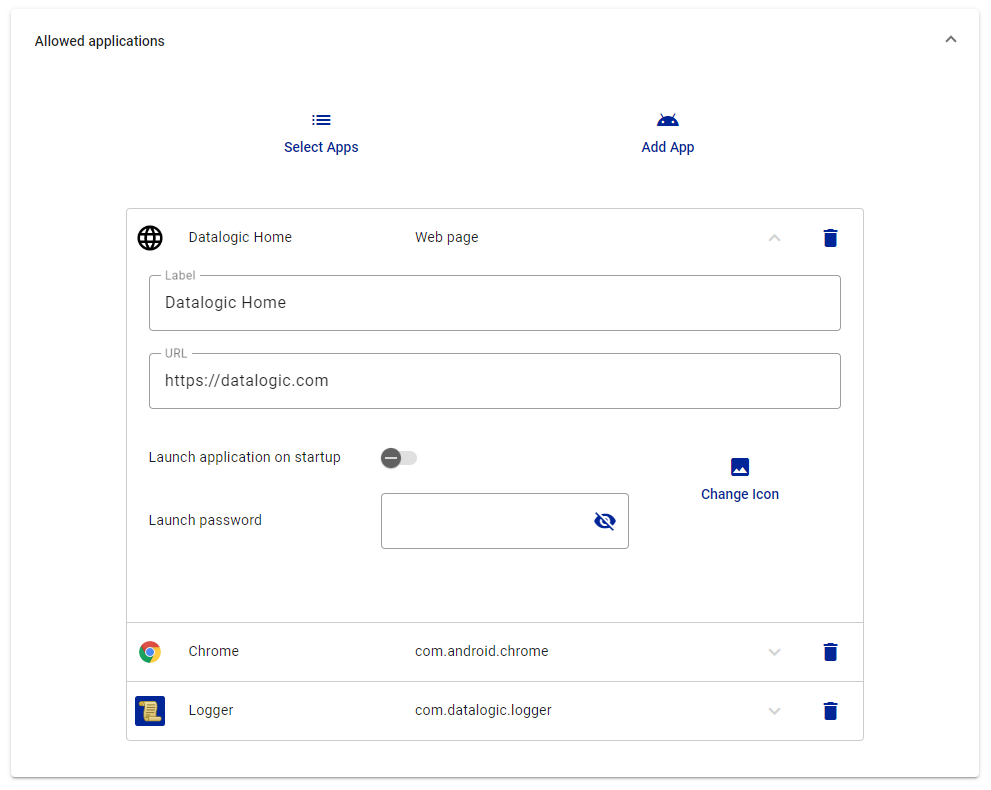
The allowed apps section controls which applications and URLs are available from the launcher. This section provides the ability to add, delete, and configure the allowed applications.
Adding an application
To add an application, click the Select Apps or Add App button.
The Select Apps button brings up a list of all preinstalled applications. To select an application, click the checkbox to the right of the application. To deselect the application, click the checkbox again. Pressing the add button at the bottom of the screen will close the popup and add all the selected applications to the allowed list. Pressing the cancel button will close the dialog and discard any change.
The Add App button brings up a dialog that allows the user to add a single application (native or web page). This option is used for adding custom applications that do not come preinstalled on the device. To add a new APK, first select the APK app type. Then enter the APK's package name and give it a label. The label is the display name of the application in the launcher. Once all the fields have been filled in, press the add button to close the popup and add the application to the allowed list. Or press the cancel button to close the popup and discard all changes.
All custom APKs need to be installed on the device or included for installation with this profile. Refer to the applications -> install section for details on installing apps.
Adding a web page
Adding a web page is like adding a single APK. First, select the Add app button. Next, change the App Type to web app. Then enter the web page's URL (http:// will automatically be added to the URL if the scheme is not included). And give it a label. Once all the fields have been filled in, press the add button to close the popup and add the web page to the allowed list. Or press the cancel button to close the popup and discard all changes.
Deleting an application/web page
To delete an entry from the allowed list. Click the (
Configuring an application
Each application card can be expanded, by clicking the down arrow (
| Label | This is the user-friendly name displayed with the icon when shown on the launcher screen. |
| Package Name | Only available for custom APKs added using the Add App button. This is the package name for this application. |
| URL | Only available for Web pages added using the Add App button. This is the URL to the web page the browser should go to when launched. http:// will automatically be added to the URL if the scheme is not specified. |
| Change Icon | Clicking this button allows the user to select a custom icon for this application. If this option is left empty, then the default icon for the application is used. A preview of the current icon can be seen at the top left corner of the app card. Once a custom icon has been selected, the icon preview will update, the name of the image file will be displayed, and a clear button will appear. |
| Launch application on startup | When enabled, this allows the user to select an application or Web page to launch immediately when the launcher starts. Note: Currently launcher only supports launching a single application on startup. If multiple applications are set to launch on startup, the launcher will only launch the first application it comes across with this option set. |
The application list also supports reordering its entries. To select an item from the list, hover your cursor over the desired app, then click and hold the left mouse button. Once you've selected an item, drag it up and down the app's list to place it in the desired position.
Appearance
The appearance section controls the visual appearance of the main launcher screen. It provides configurations for the layout and size of the applications, the background color, and the wallpaper.
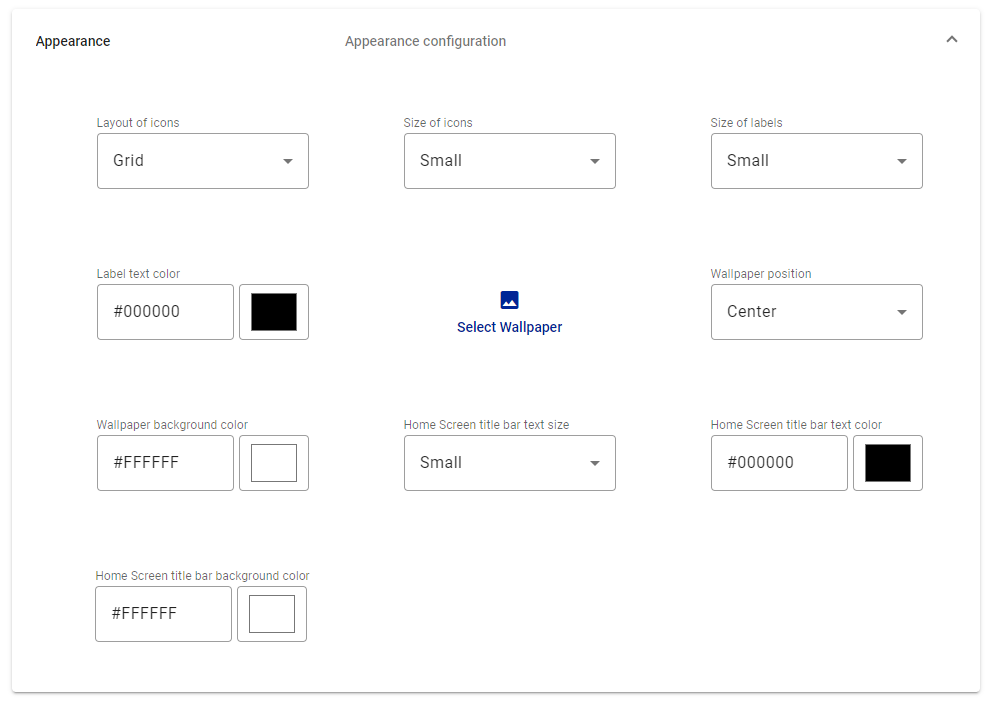
See the Appearance Settings page for more information on the launcher appearance configurations.
Allow all applications to launch others
This section determines which apps/packages are allowed to launch. By default, the toggle is disabled, which restricts launching to only those packages included in the Allowed Applications/Packages lists. This can prevent apps from launching an activity within another app that is not on the Home Screen. To change this behavior, do one of the following:
- Toggle this switch to enabled, which allows all packages to be launched.
- Add one or more packages to the list in Allowed Packages (see next section). This approach is more secure, as it only allows the package you need without permitting others.
Allowed Packages
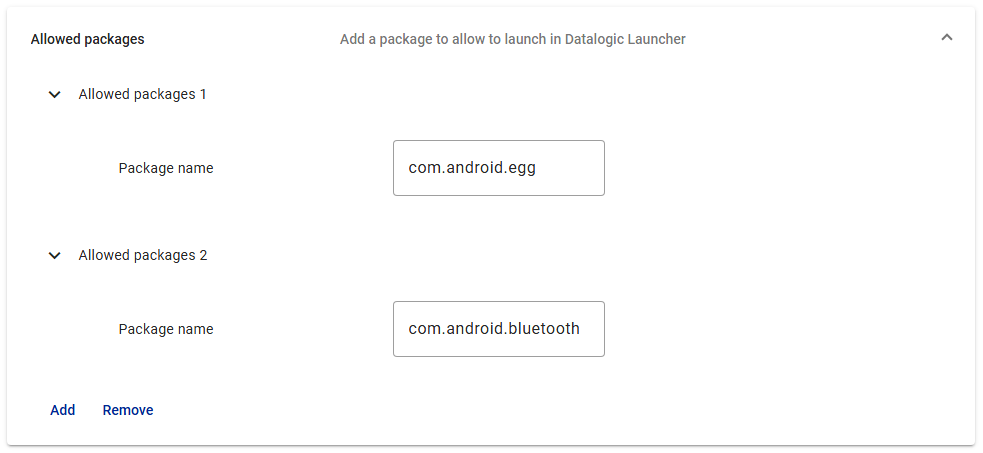
The Allowed Packages section lets you specify which services on the device are permitted to be ran while using the Datalogic Launcher.
Adding a package
To add a package, click the Add button. A new entry will appear where you can enter the package name (for example, com.android.egg or com.android.bluetooth). You can add multiple packages by repeating this process.
Removing a package
To remove a package from the allowed list, click the Remove button to delete the most recent package. If there is only one package and you wish to remove it, clear the text field.
You can verify that Datalogic Launcher successfully applied these settings by viewing the "Allowed Packages" section in the Launcher settings on the device.
User Interface
The User Interface section provides controls for the overall user interface of the device while the launcher is running.
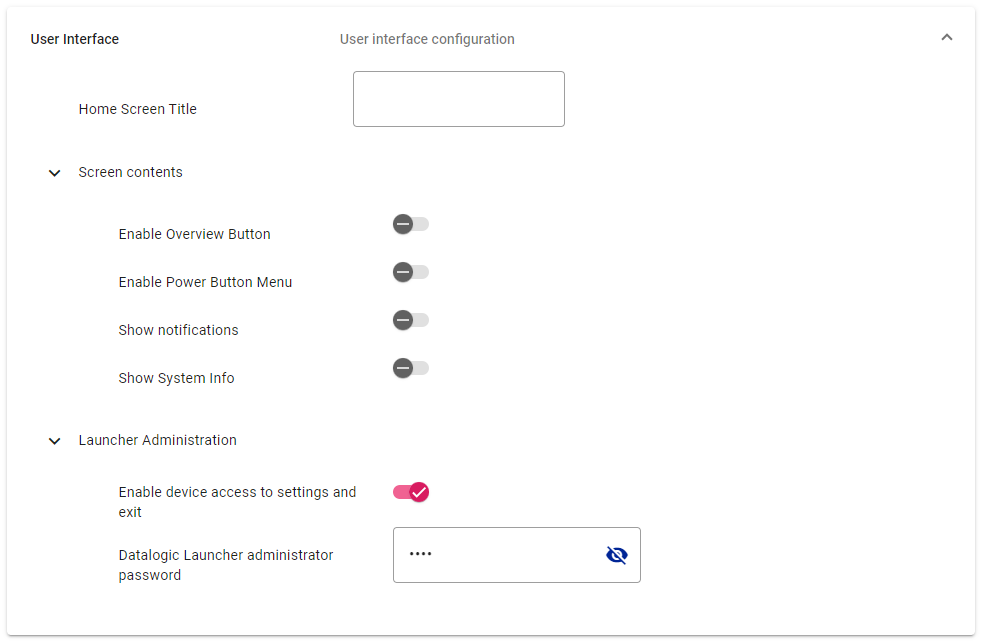
See the Launcher Settings page for more information on the user interface configurations.