Wi-Fi Setup Page
Some of the functionality described on this page requires Scan2Deploy agent v1.35 or higher to work correctly. If you have Scan2Deploy agent v1.33 or lower:
- Proxy Settings and IP Address Settings in the Advanced section will have no effect on your device.
- Availability values of
During stagingandAfter stagingwill be treated as having a value ofAlways. - EAP-TLS network connections you have defined will not successfully connect.
Ensure your device has Scan2Deploy agent v1.35 installed or make sure Scan2Deploy is checked on the Save and Scan > Mobility Suite Updates page.
This page allows users to configure Wi-Fi networks on the device. There are no artificial limits placed on the total number of networks you can define, however the configuration details for each network is stored in the Scan2Deploy barcode(s), and adding more networks may result in having to scan more barcodes.
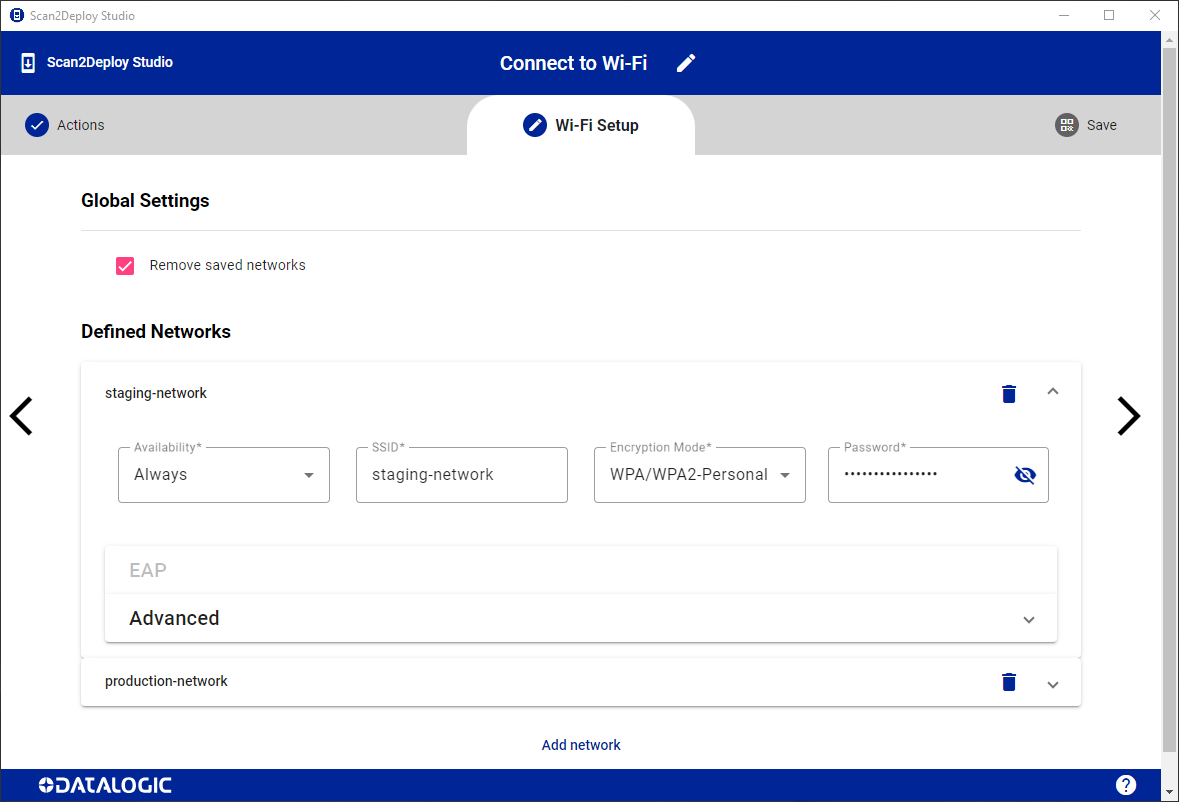
Global Settings
Remove saved networks
- If checked, all other networks not defined in the Defined Networks section will be removed.
- If unchecked, any existing networks on the device that are not defined in the Defined Networks section will be left alone.
Defined Networks
Availability
Determines at what point during the staging process a network is configured. For example, if you have one network that must be used during staging, and another network that must only be used after staging is complete, you can use the availability field to accomplish this. Any given network you configure can be assigned one of the following availability values:
- Always - network will be configured for use both during and after staging.
- During staging - network will be configured for use during staging, and then removed afterwards.
- After staging - network will be configured for use only after staging is complete.
Encryption Mode
Each network can have one of the following network encryption modes:
- None
- Enhanced Open
- WEP
- WPA/WPA2-Personal
- WPA3-Personal
- WPA/WPA2/WPA3-Enterprise
- WPA3-Enterprise 192-bit
Enhanced Open, WPA3-Personal, and WPA3-Enterprise 192-bit networks are only available on certain Datalogic devices running Android 10 and above. These options will only appear if the device selected on the Action Selection page supports it.
EAP
By setting the Encryption Mode to WPA/WPA2/WPA3-Enterprise or WPA3-Enterprise 192-bit, the EAP section is enabled. This section allows you to configure the following types of EAP networks:
- PEAP
- TLS
- TTLS
- PWD
- SIM
- AKA
- AKA-PRIME
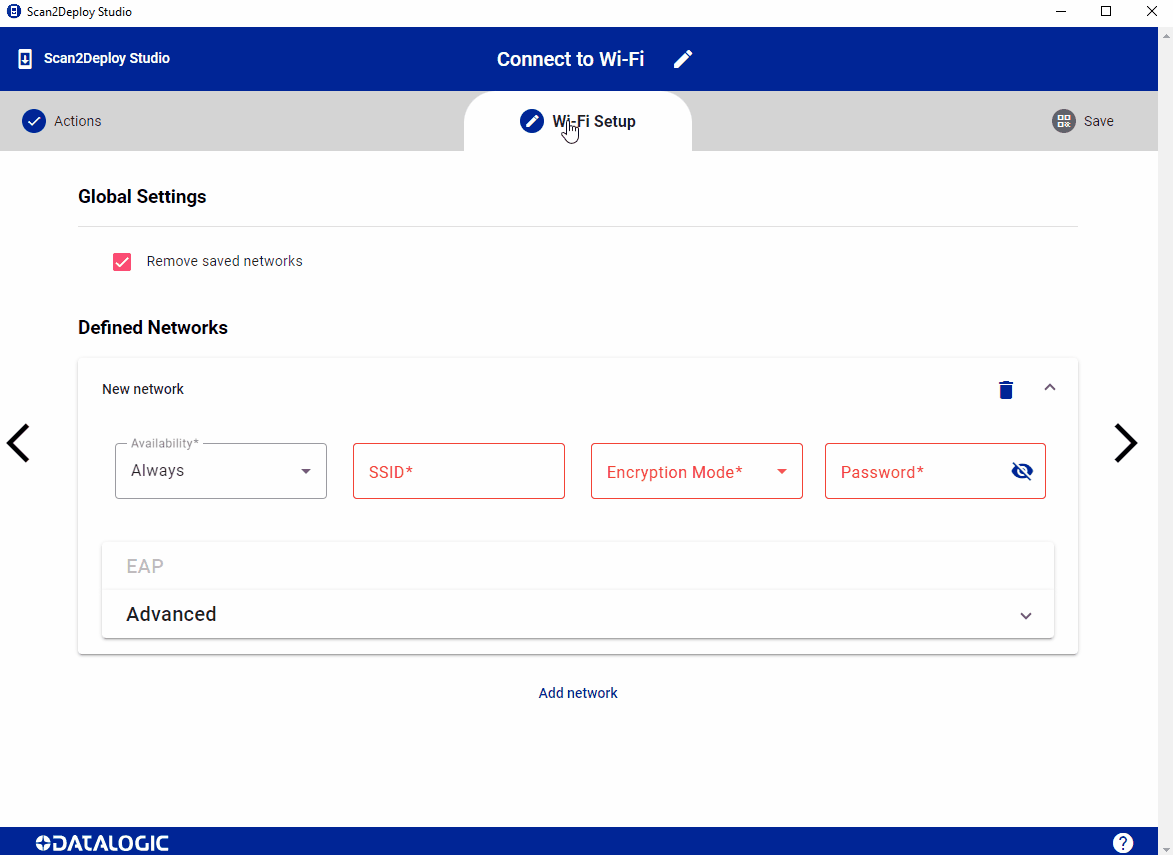
Advanced
The Advanced section offers the ability to set a network proxy to use for the connection as well as various other deployment options. Currently, all Advanced settings apply to all Wi-Fi profile encryption method and EAP method types.
General Settings
- Hidden - If you are connecting to a network that doesn't broadcast it's SSID, this field should be checked.
Proxy Settings
- Proxy Host - Server name or IP address of the proxy to be used for HTTP/HTTPS communications.
- Proxy Port Number - Server IP port of the proxy for HTTP/HTTPS communications.
- Bypass Proxy for - Comma-separated list of hosts that you want to exclude using the proxy on connections for. These hosts can use wildcards such as *.example.com.
IP Address Settings
The fields in this section can be used to define a static IP address and related settings. If all fields are left blank, a DHCP connection will be used instead.
- IP Address - static IPv4 address to use for this connection. For example: 192.168.1.10.
- Prefix - value from 0 to 32. specifies how many of the 32 bits in the IP Address are used to identify the network portion of the address. A prefix of 24 would be equivalent to a netmask of 255.255.255.0. Assuming you specified an IP address of 192.168.1.10, this would imply the network is 192.168.1.x, where x be used to identify 255 possible clients (1-255) on the network.
- Gateway - static IPv4 address of the gateway device on this network. For example: 192.168.1.1.
- DNS1 IP - IPv4 address of the primary DNS server on this network.
- DNS2 IP - IPv4 address of the backup DNS server on this network.
Adding additional networks
To define an additional network, click the Add network button.