C# Barcode Reader Tutorial
Introduction
In this tutorial, we will be creating a simple console application in C# that opens, claims and enables a scanner device and provides a mechanism to see what labels were scanned with that device. This tutorial only covers a very basic aspect of development using OPOS with C#, but should suffice as a starting point for any application that looks to read labels from a Datalogic scanning device.
Prerequisites
Developing an application for a Datalogic scanning device requires you to first have Datalogic's OPOS installed. The OPOS installer ensures the required ActiveX Controls are registered and any supporting files are present.
Creating a project
-
Using Visual Studio 2019, navigate to File > New > Project ...

-
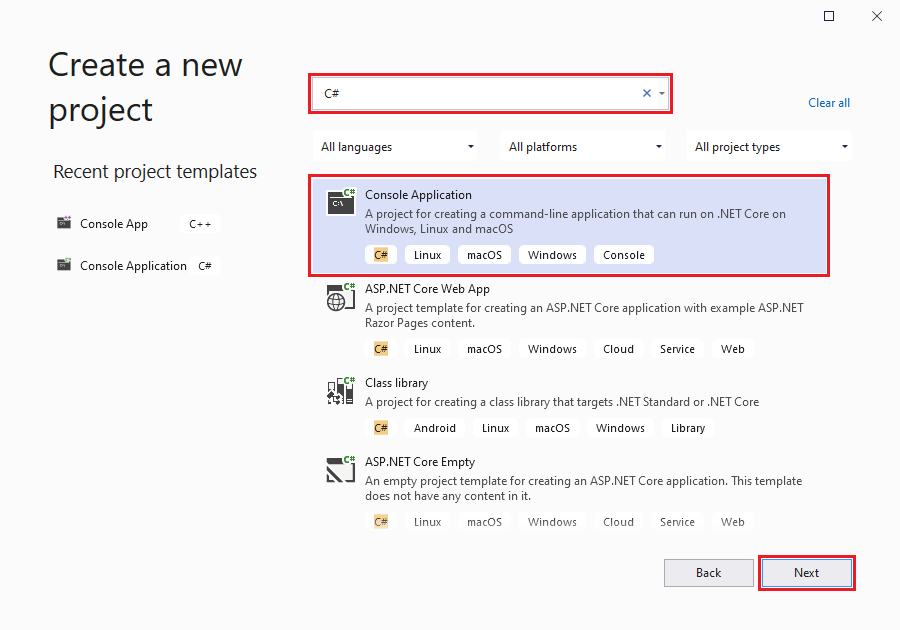
In the Create a new project dialog, set the filter to C#, select Console App and select Next
-
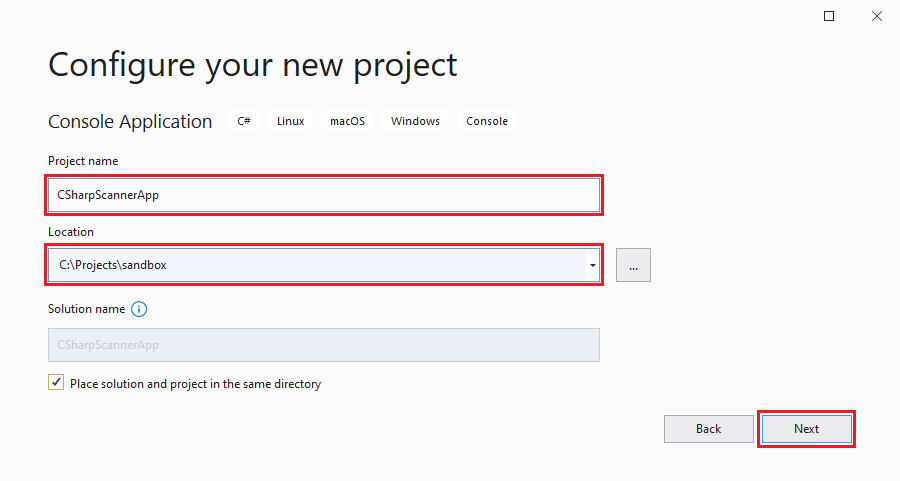
In the Configure your new project dialog, declare your Project name, Location and Solution name as desired and then select Next.
-
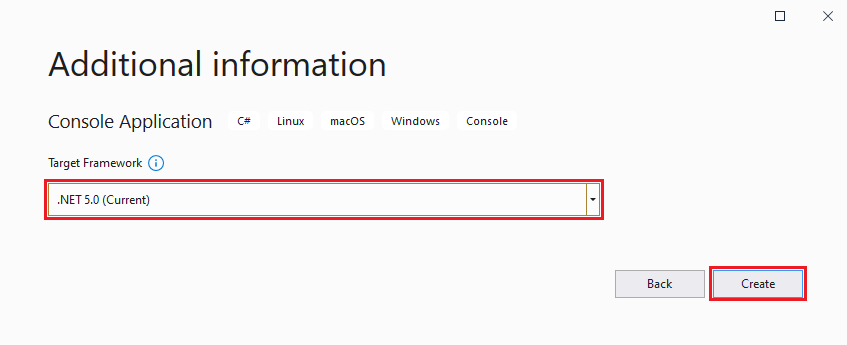
In the Additional information dialog, make sure the Target Framework is set to .NET 5.0 and then select Create.
-
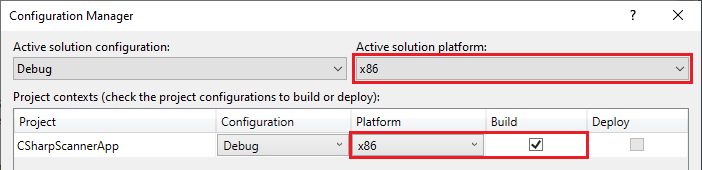
After the project has initialized, you must create and use an x86 configuration; failure to do this will result in the unhandled exception 80040154 Class not registered (0x80040154 (REGDB_E_CLASSNOTREG)) when you run the application. The Configuration Manager can be accessed by navigating to Build > Configuration Manager....
Exposing OPOS control objects
The very first step is to reference the scanner ActiveX Control as a dependency.
-
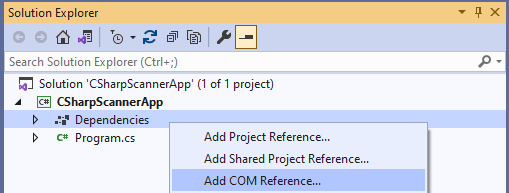
Using the Visual Studio 2019 Solution Explorer, right mouse click Dependencies and select Add COM Reference from the context menu.
-
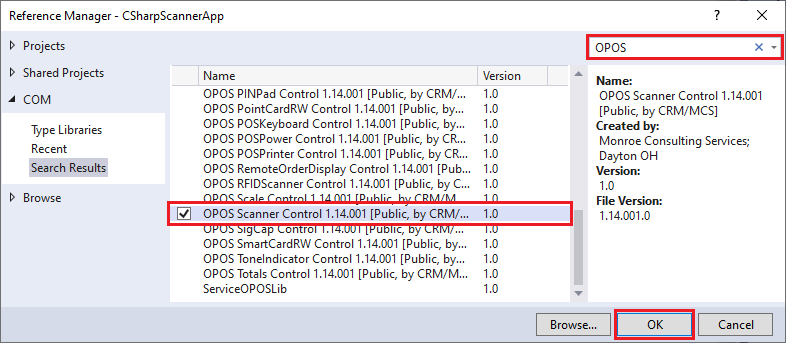
When the Reference Manager dialog appears, filter on the keyword OPOS, select the OPOS Scanner Control and then select OK.
-
At this point, expanding the Dependencies node of the Solution Explorer, you will see
Interop.OposScanner_CCO.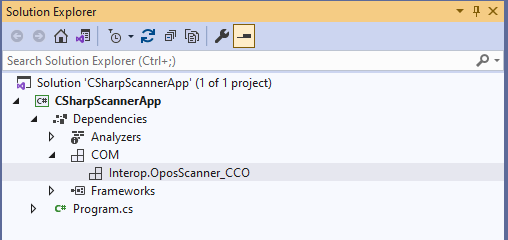
-
Near the top of your source file, add the statement
using OposScanner_CCO;using System;
using OPOSCONSTANTSLib;
using OposScanner_CCO;
namespace CSharpScannerApp
{
class Program
{
static void Main(string[] args)
{
}
}
}
Creating the OPOS scanner object
Creating the scanner object requires you to simply declare and instantiate it. However, if you attempt to build the application at this point you will encounter error CS1752: Interop type 'OPOSScannerClass' cannot be embedded. Use the applicable interface instead.
using System;
using OposScanner_CCO;

namespace CSharpScannerApp
{
    class Program
    {
        private static OPOSScannerClass scanner;

        static void Main(string[] args)
        {
            // Create a scanner object.
            scanner = new OPOSScannerClass();
        }
    }
}
This issue is easily resolved by the following:
-
Expand the Dependencies and COM nodes in the Solution Explorer.
-
Right mouse click on
Interop.OposScanner_CCOand select Properties from the context menu. -
Set
Embed Interop Typesto No.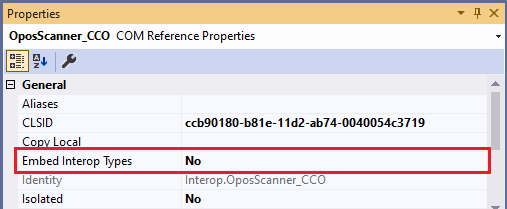
Accessing the OPOS Scanner interface
At this point, you are ready to use the scanner object.
The OPOS standard defines a general sequence to access a device:
- open: open a context to the device
- claim: claim control over the device
- enable: enable the device's operation
- disable: disable the device's operation
- release: release control over the device
- close: close the context to the device
Opening a scanner context requires you to reference a device profile (a device profile simply being a name representing a set of parameters relevant to the device). When OPOS is installed, scanner profiles are seen as the subkey names installed under the UPOS-specified registry key HKEY_LOCAL_MACHINE\Software\Wow6432Node\OLEforRetail\ServiceOPOS\SCANNER. It is your choice whether you want to programmatically obtain the profile names from the registry or to simply hard-code them in your application.
If the scanner context is successfully opened, you can then claim the device, gaining exclusive access to it. And if the device is successfully claimed, you can then enable it to perform subsequent operations.
using System;
using OposScanner_CCO;

namespace CSharpScannerApp
{
    class Program
    {
        private static OPOSScannerClass scanner;

        static void Main(string[] args)
        {
            // Create a scanner object.
            scanner = new OPOSScannerClass();

            // Open a context with the scanner (e.g. "USBScanner").
            string profileName = "<your selected profile>";
            scanner.Open(profileName);

            // Claim control of the scanner using a 1000 millisecond timeout.
            scanner.ClaimDevice(1000);
            if (scanner.Claimed)
            {
                // Enable the scanner and decoding events.
                scanner.DeviceEnabled = true;
                scanner.DataEventEnabled = true;
                scanner.DecodeData = true;

                //
                // more to come ....
                //

                // Disable and release the scanner.
                scanner.DataEventEnabled = false;
                scanner.ReleaseDevice();
            }

            // Finally, close the scanner context.
            scanner.Close();
        }
    }
}
Implementing event functions
At this point, the scanner object can act as a sink (an object that receives input from the device). However, to make the application useful you must connect the scanner object to a DataEvent() method, allowing the application to retrieve the label data obtained by the scanner object.
To see the event methods of the associated interface class _IOPOSScannerEvents_Event
-
Right mouse click on
OPOSScannerClassin your source code and then select Peek Definition from the context menu.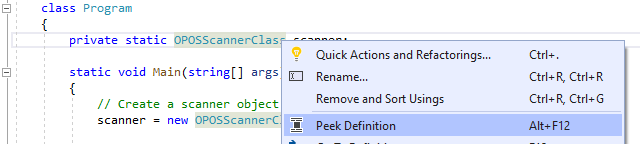
-
Scrolling to the bottom of the displayed window you see four event methods.

-
Placing your cursor over
_IOPOSScannerEvents_DataEventEventHandleryou will see the method signature.
For our purposes, we need to provide a simple DataEvent() method.
  static private void DataEvent(int value)
  {
      Console.WriteLine("Data: " + scanner.ScanDataLabel);
      scanner.DataEventEnabled = true;
  }
Tying it all together
All that remains to be done is to connect the scanner object to the delegate method DataEvent() and to write some simple thread management code.
Connecting the scanner object to the delegate method is done by simply adding the statement scanner.DataEvent += DataEvent; to your code.
Finally, a more complete example can be found in the Datalogic OPOS Examples.
using System;
using System.Threading;
using OposScanner_CCO;

namespace CSharpScannerApp
{
    class Program
    {
        private static OPOSScannerClass scanner;

        static void Main(string[] args)
        {
            // Setup the console program to exit gracefully.
            var exitEvent = new ManualResetEvent(false);
            Console.CancelKeyPress += (sender, eventArgs) =>
            {
                eventArgs.Cancel = true;
                exitEvent.Set();
            };

            // Create a scanner object.
            scanner = new OPOSScannerClass();

            // Open a context with the scanner (e.g. "USBScanner").
            string profileName = "<your selected profile>";
            scanner.Open(profileName);

            // Claim control of the scanner using a 1000 millisecond timeout.
            scanner.ClaimDevice(1000);
            if (scanner.Claimed)
            {
                // Subscribe to the delegate.
                scanner.DataEvent += DataEvent;

                // Enable the scanner and decoding events.
                scanner.DeviceEnabled = true;
                scanner.DataEventEnabled = true;
                scanner.DecodeData = true;

                // Wait for exit event (meanwhile handling scanner events).
                exitEvent.WaitOne();

                // Unsubscribe from the delegate.
                scanner.DataEvent -= DataEvent;

                // Disable and release the scanner.
                scanner.DataEventEnabled = false;
                scanner.ReleaseDevice();
            }

            // Finally, close the scanner context.
            scanner.Close();
        }

        static private void DataEvent(int value)
        {
            Console.WriteLine("Data: " + scanner.ScanDataLabel);
            scanner.DataEventEnabled = true;
        }
    }
}