Frequently Asked Questions (Android)
How do I enable the DXU Android service?
In order to connect your device to DXU Desktop, the DXU Agent service must be enabled on the device.
The DXU Agent service is enabled by default on pre-Android 9 devices. On Android 9 and above devices, the DXU Agent service will need to be enabled. There are multiple ways to enable DXU Agent.
Option 1: Scan2Deploy as Device Owner
The DXU Agent service will automatically be enabled when Scan2Deploy is made Device Owner.
Option 2: Send an intent from an Enterprise Mobile Management (EMM) Admin Console
Send the following intent from your EMM to enable or disable DXU Agent:
Action: com.datalogic.dxu.action.ENABLE_DXU

Component: com.datalogic.dxu/.plugin.DxuSettingsReceiver

Extras:
    - enableService = true (to enable)
    - enableService = false (to disable)
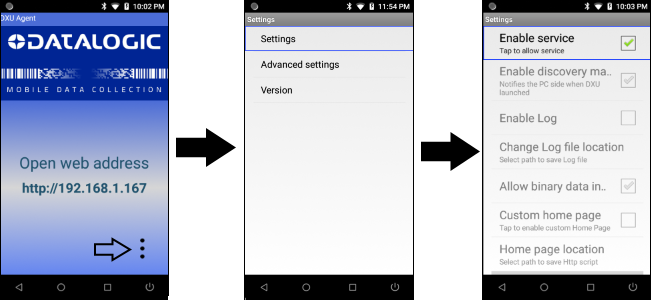
Option 3: Enable service from the DXU Agent application on the device
-
Open the DXU Agent application on the device.
-
Tap the Menu button (⋮) to display the menu.
-
Go to Settings > Enable Service.
How do I connect devices via USB?
You can connect to a Datalogic mobile computer directly by connecting it to your PC with a USB cable.
First, make sure the DXU Android service is running. See steps above.
Enable USB debugging
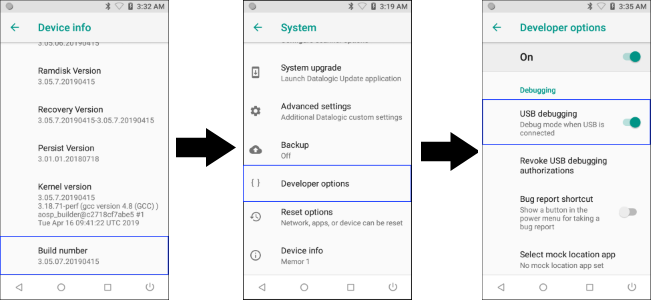
In order to connect your device to DXU via USB, you will need to enable USB debugging on your device.
-
On your device, go to Settings > System > About phone > tap Build number 7 times to enable Developer Options.
-
Go back to the previous screen in Settings and select Developer Options.
-
In Developer Options, enable USB debugging.
Once you have enabled USB debugging on your device, you are ready to connect your device to DXU.
-
Launch DXU on your PC.
-
Connect your device to your PC with a USB cable.
-
On the device, allow the USB debugging connection.
-
Click the device’s button in the “Available Device” list.
What if my USB connection still isn't working?
If your USB connection still isn't working, first, make sure the DXU Android service is running. See steps above. If you are still having trouble, you can verify you can see the device at an adb shell correctly.
Open Device Tools Command Prompt
-
In Windows, under Start > Datalogic Android, click Device Tools Command Prompt.
-
This essentially opens a Windows
Command Promptwith the path to the Datalogic Android tools (typicallyC:\Program Files (x86)\Datalogic\Android\USB Drivers\bin\) added to the WindowsPATH. -
If you don't have a shortcut for Device Tools Command Prompt, reinstall DXU, making sure to check
Install ADB driver for Android devicein the installer. -
In the window that opens up, type
adb version.

-
If the version reported is less than
1.0.41, you have an out of date version of theDatalogic Android USB device driversinstalled. ReinstallDXU, making sure to checkInstall ADB driver for Android devicein the installer. -
Type
adb devicesat the command prompt. -
If your device is listed and your screen looks like the following, the adb test is successful.

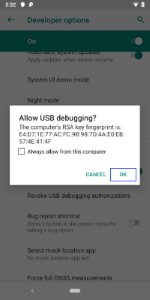
- However, if you see a message that indicates the device is unauthorized, you most likely have an
Allow USB debugging?message that needs to be answered on your device. Allow it on your device and try running theadb devicescommand again.

- If you see a message that indicates
daemon not running; starting now at tcp:5037, and the device is displayed, the adb test is successful.

- However, if there is an unauthorized device listed, you will need to allow the ADB connection on the device before continuing.

Try connection to HTTP server on device
Assuming you are able to connect to the device successfully over adb, the next step is to try to connect the DXU HTTP server on the device.
-
Open DXU Desktop.
-
In your Device Tools Command Prompt window, run
adb forward --list. If ports are listed, as depicted in the image below, you can proceed to the Connect to getInfo step.

- If the list is empty, there is no route set up to the device. As a troubleshooting step, you can manually create one, as seen in the second image, and then proceed to Connect to getInfo DXU Desktop should have done this on it's own. It could be necessary to reboot your PC, reopen DXU Desktop, and then check the adb forward list again.


Connect to getInfo
-
Open a web browser and connect to the local tcp port attached to the DXU agent port on the device side (
8080by default) onlocalhost. This would be port20010or port63368in the examples above, but keep in mind the port number is dynamic and will be different on your PC.http://localhost:20010/getInfoThis should result in XML info being returned to your browser.
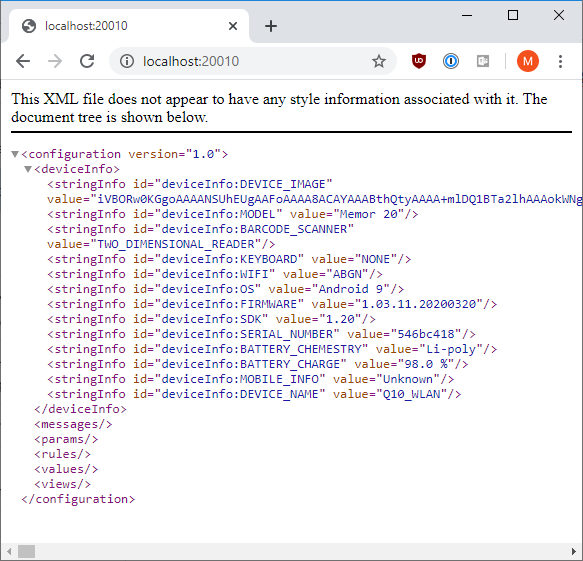
If you don't get a page similar to this, check to make sure
DXU Serviceis enabled in DXU Agent on your device and try again. If you continue to have trouble, try to reboot your device.
How do I connect via the wireless network manually?
First, make sure the DXU Android service is running. See steps above.
If DXU Agent on the device has its “Enable Discovery Manager” feature enabled and DXU has “Automatic Discovery of Devices” enabled under Advanced Settings, then clicking Refresh should display it in the “Available Device” list if it is in the same subnet.
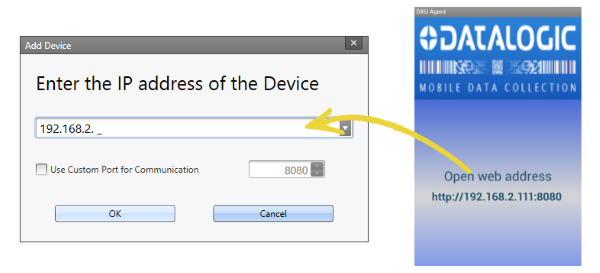
However, if you want to manually add a device in DXU make sure both device and system are in the same subnet and do this:
-
On DXU’s main view, click the “Add Device“ button
-
In the “Add Device“ dialog, enter the IP address of the device and optionally its port if it is has been changed from the default.
If the port number is not displayed with the IP address in DXU Agent, it can be found by tapping Menu > Settings > Advanced Settings > Device HTTP server port.
tipYou will see the IP Address and port details displayed on DXU’s main view along with the model name, serial number, and an illustration of the device.
-
Click the OK button to complete.
The added device will display on the left side of the console under Available Device.
You can also directly connect the device to DXU using USB.
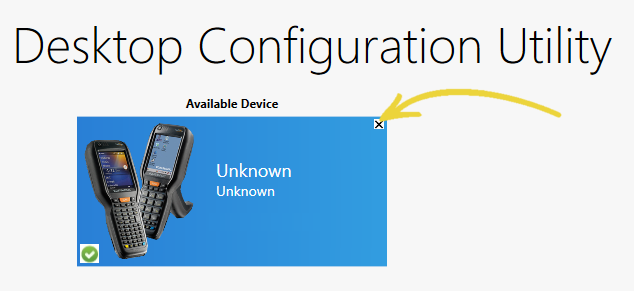
How do I remove a device from the available device list?
To remove a device from the available device list, simply click the exit button (X) located at top right of the device.
How can I edit a DXU file?
A DXU file is an XML text file that has been zipped in the standard zip format. Therefore, it is possible to edit it "manually" if desired. The following example demonstrates how to Wi-Fi networks from a configuration file.
-
Use Windows File Explorer to navigate to a DXU file that has been previously saved with a Wi-Fi network configured. Sample file available here.
-
Change the file extension from .dxu to .zip.
-
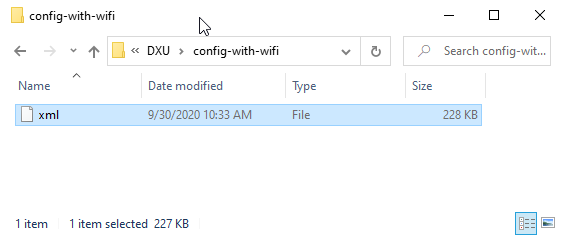
Extract the zip file. In Windows 10, you can simply right click > Extract all.
-
The extracted file is called xml and has no file extension.
-
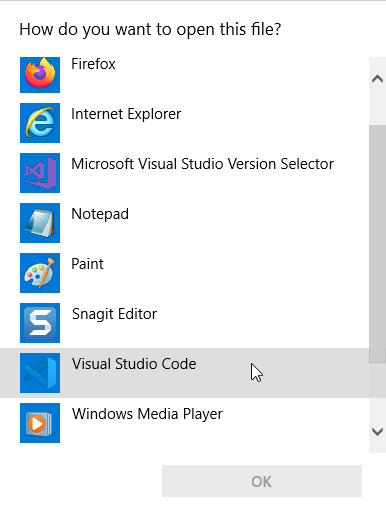
Open xml. Since it has no file extension, you will need to select a text editor you would like to use to edit the file.
-
Scroll to the bottom of the file and locate the
<values>tag. Find the<array ref="ADD_WIFI_NETWORK>section.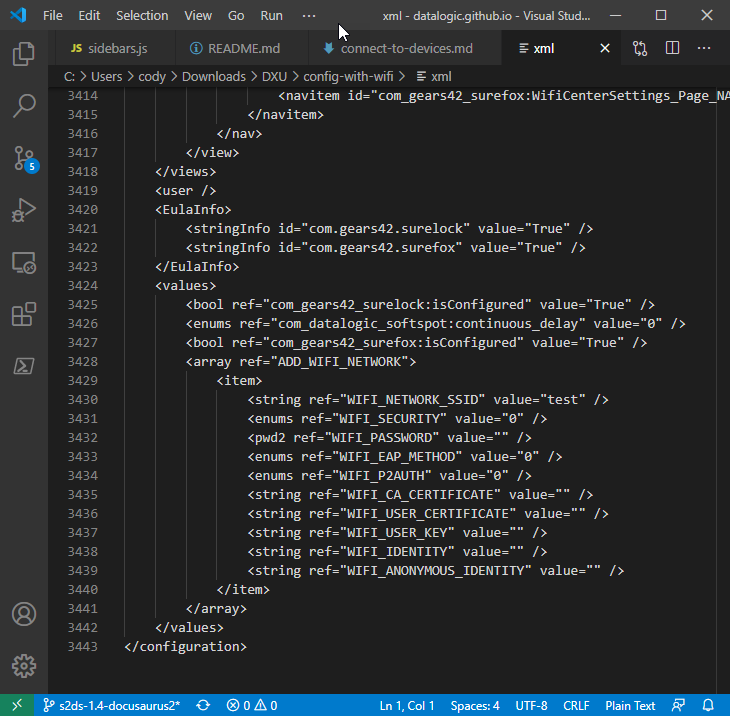
-
Delete the
<array ...tag, along with everything inside it, all the way to, and including the closing</array>tag. Continuing from the screenshot above, the file will look like this now: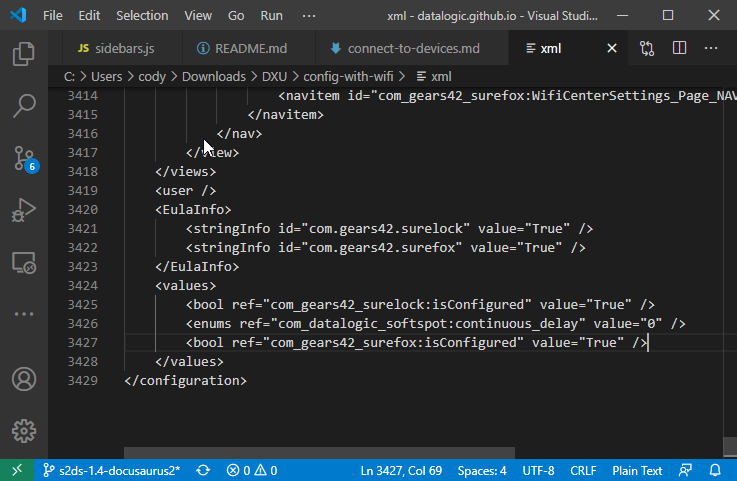
-
Save the file.
-
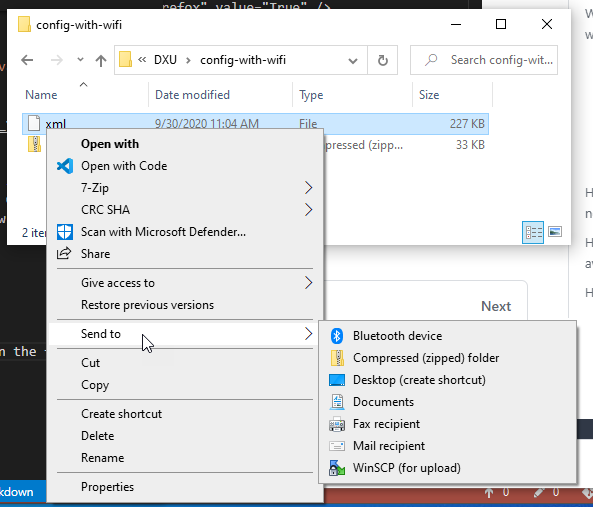
Zip the file. In Windows 10, you can right click on the file > Send to > Compress (zipped) folder.
-
Change the extension of the new file from .zip to .dxu.
-
Now, open the file in DXU Desktop to verify that no Wi-Fi networks are present. You can do this by clicking Load Configuration on the DXU home screen, and then selecting the new file.
Sample file with Wi-Fi networks removed available here.