Aladdin Setup
Initial Setup
When the Aladdin app is first run, several dialogs will come up with different purposes. These dialogs are used to grant application permissions and enable features.
Enable Application Permissions
To connect to a CODiScan scanner, you need to pair your device via BLE. After launching the application, the allowed application permissions are displayed.
Some features of the Aladdin application require permissions for Bluetooth, Device Location, Nearby devices. When you first launch the app it will bring up a dialog describing the permissions the user will need to grant in order to use the application:
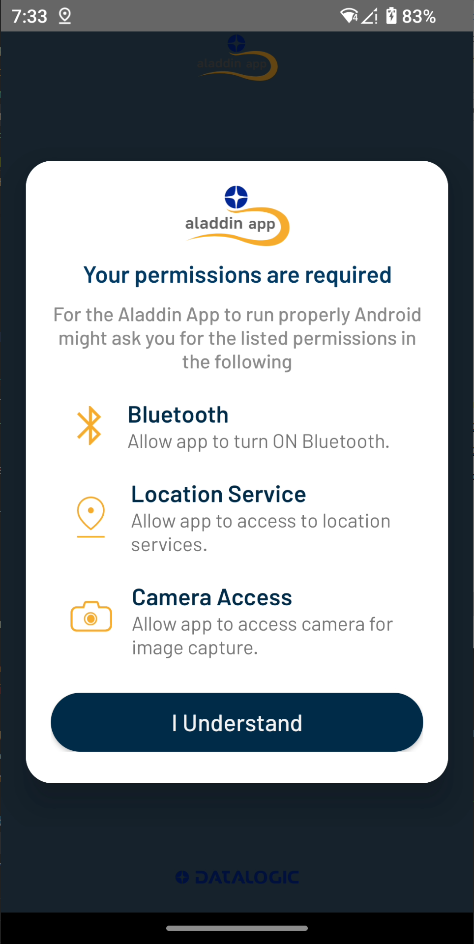
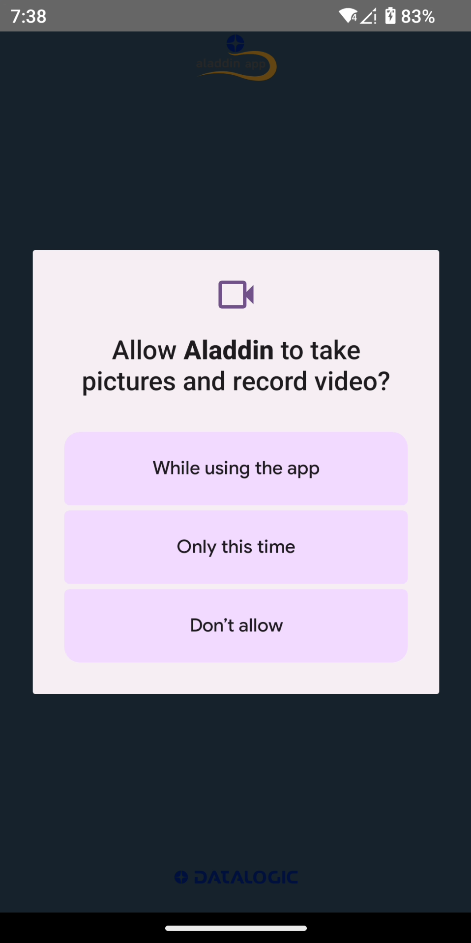
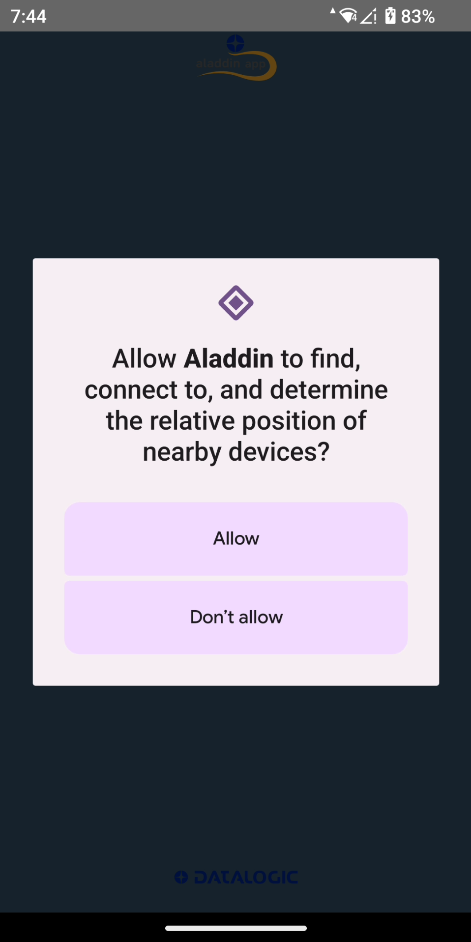
The screenshots below show an example of android permission requests. Depending upon the android version and the request, grant permissions by either tapping “Allow” or “While using the Application”.

If a permission is already granted before launching the application, you will not be asked to grant the permission again when launching the app.
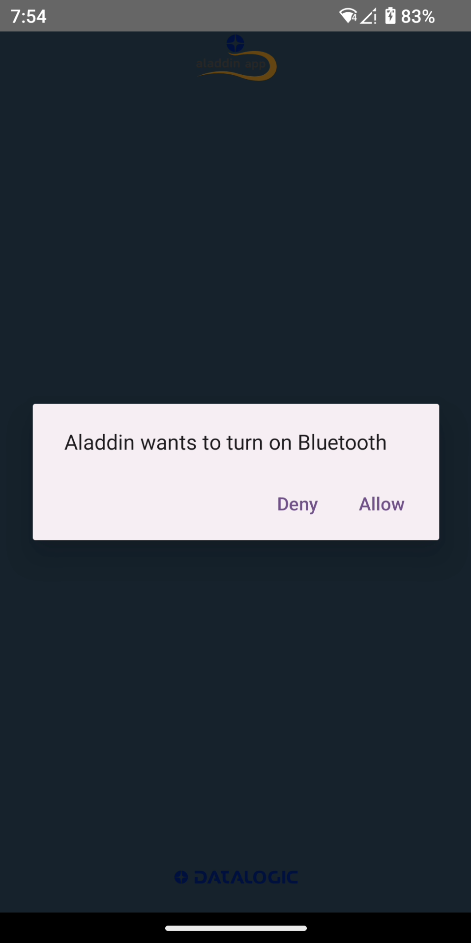
Enable Bluetooth
Bluetooth is required for the Aladdin application to communicate with the CODiScan. If Bluetooth is disabled in the mobile device, the application will ask you to enable it via the pop-up dialog as seen in the screenshot below.
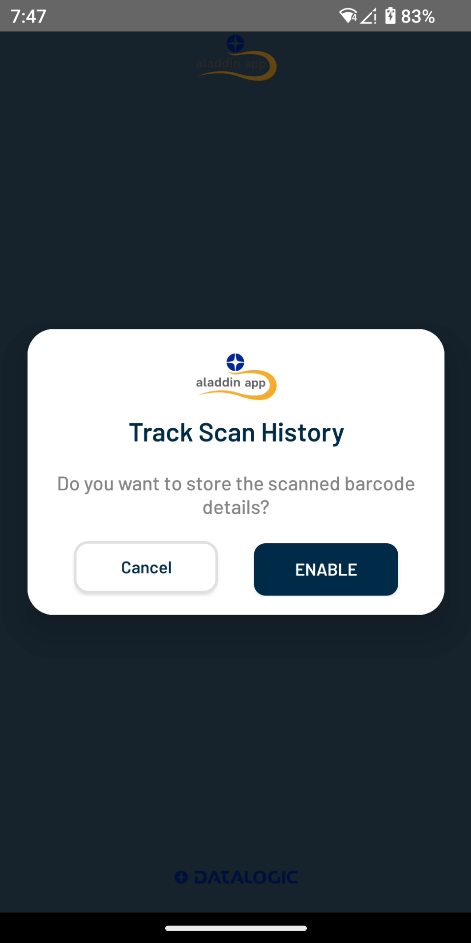
Scan History (Optional)
To store the history of barcodes scanned by the CODiScan in the application, tap “Enable” as shown in the screenshot below:
Aladdin On-Screen Keyboard (Optional)
The Aladdin application also provides a custom on-screen keyboard interface. This allows for the Aladdin app to input barcode data as though it were typed in the on-screen keyboard.
Once all the permissions are granted, the application will direct you to the Aladdin keyboard setup process. Using the Aladdin keyboard is optional. It should only be enabled if you need barcode data to be entered via keyboard input.
The following screenshots show the steps involved in enabling the Aladdin keyboard:
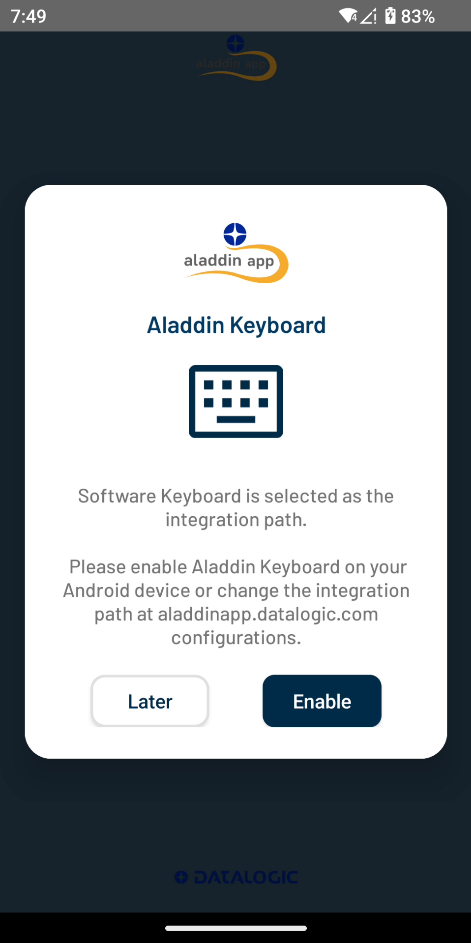
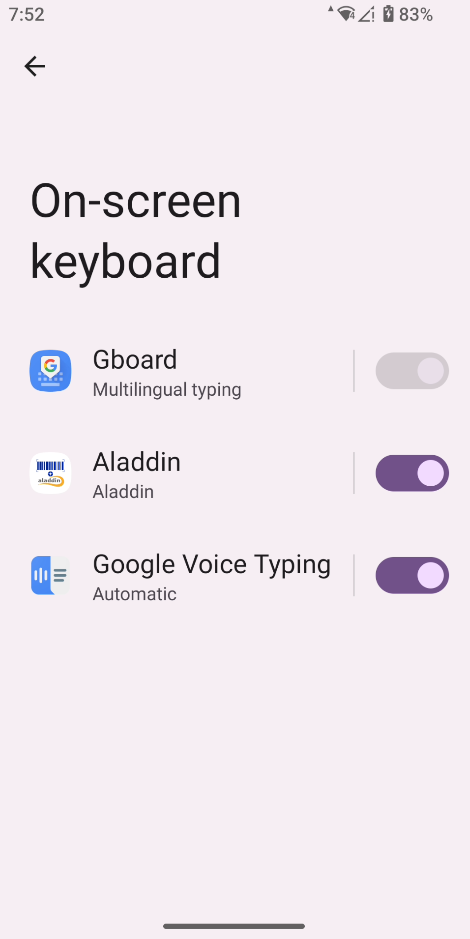

The first screenshot shows the dialog that initially comes up to ask whether the keyboard should be enabled. If you click "Enable" in this dialog, you will be directed to the on-screen keyboard settings screen. This can be seen in the second screenshot. When on this screen, select "Aladdin" to enable the Aladdin keyboard. Once you have completed this step tap the back button to go back to the Aladdin application. Once you are back at the Aladdin application, select "Choose" to enable the keyboard integration method as seen in the last screen shot.
When enabled, the Aladdin keyboard replaces the default on-screen keyboard (Gboard). Go to "Android Settings" > "Language & Inputs" > "On-Screen Keyboards" in the Settings app and turn of the "Aladdin" on-screen keyboard.
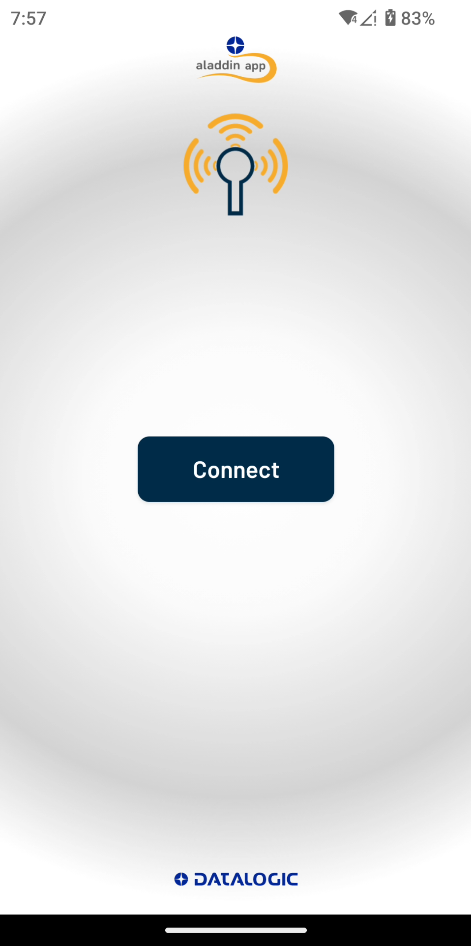
Pairing with the CODiScan
Once you have completed the initial setup, the next step is to pair your CODiScan with Aladdin app. Tap the "Connect" button. This will bring up a pairing barcode.

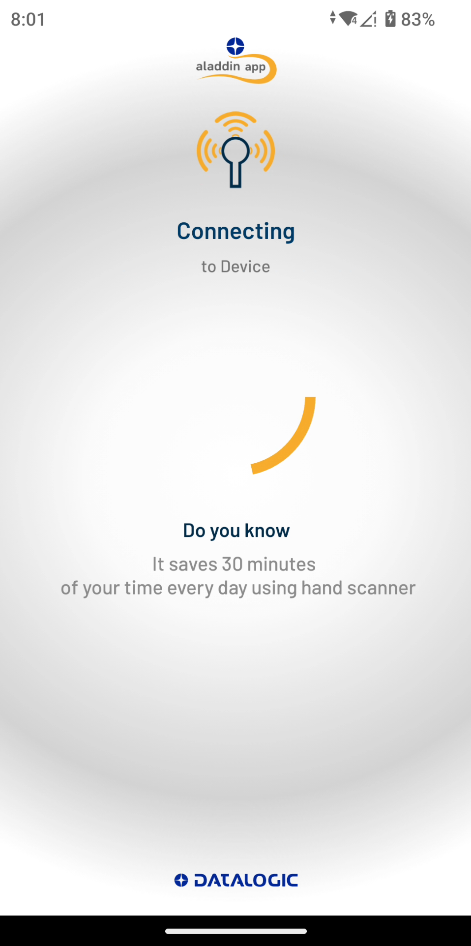
Turn on your Datalogic CODiScan and point it at the barcode that is displayed in the CODiScan app. The device will emit a beeping sound followed by a pulsating blue LED on the CODiScan. The Connecting screen will appear.
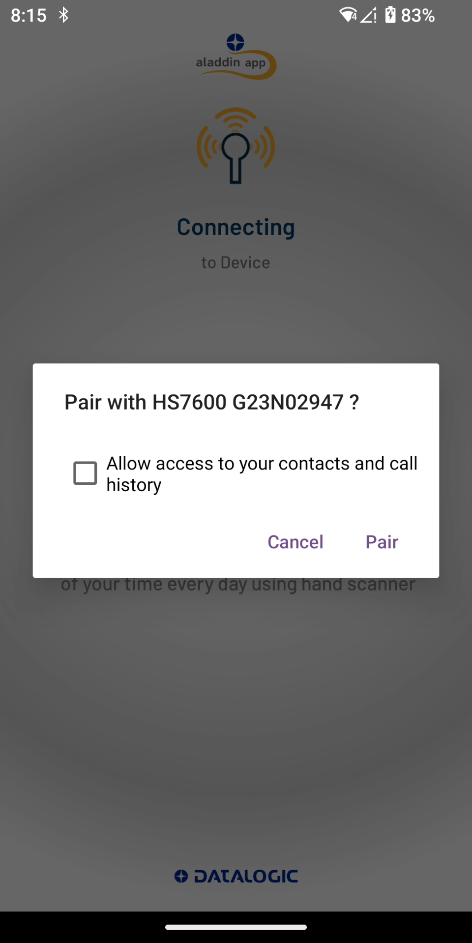
A notification will then come up asking if you wish to pair. Click "Pair & connect" in pairing request notification (first screenshot below). Tap "Pair" on the android pairing pop-up screen (second screenshot below). This will initiate the connection request to the CODiScan. Contacts and call history checkbox is not mandatory. If Connection is successful, the CODiScan will emit a beep sound followed by a connection success screen:

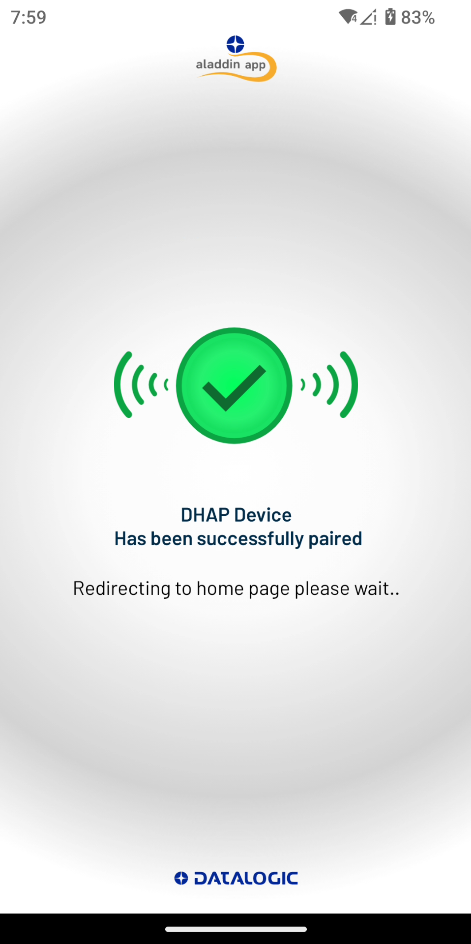
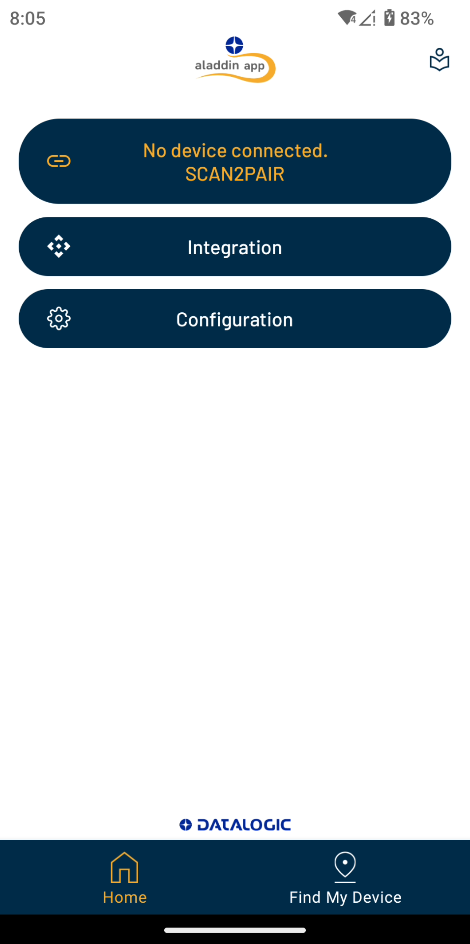
Upon successful connection, the Application will automatically direct you to the home screen that shows various application features, battery information, and other information.

Tap “Disconnect” to disconnect from the CODiScan. You will not be unable to use the application unless the CODiScan is paired again.
Once the connection is closed, the the first screenshot below will appear. If you try to tap any other buttons, the application will remind you that it is necessary to pair with the CODiScan. Tap the SCAN2PAIR button to display the pairing screen again as shown below.